 Save to Pinterest
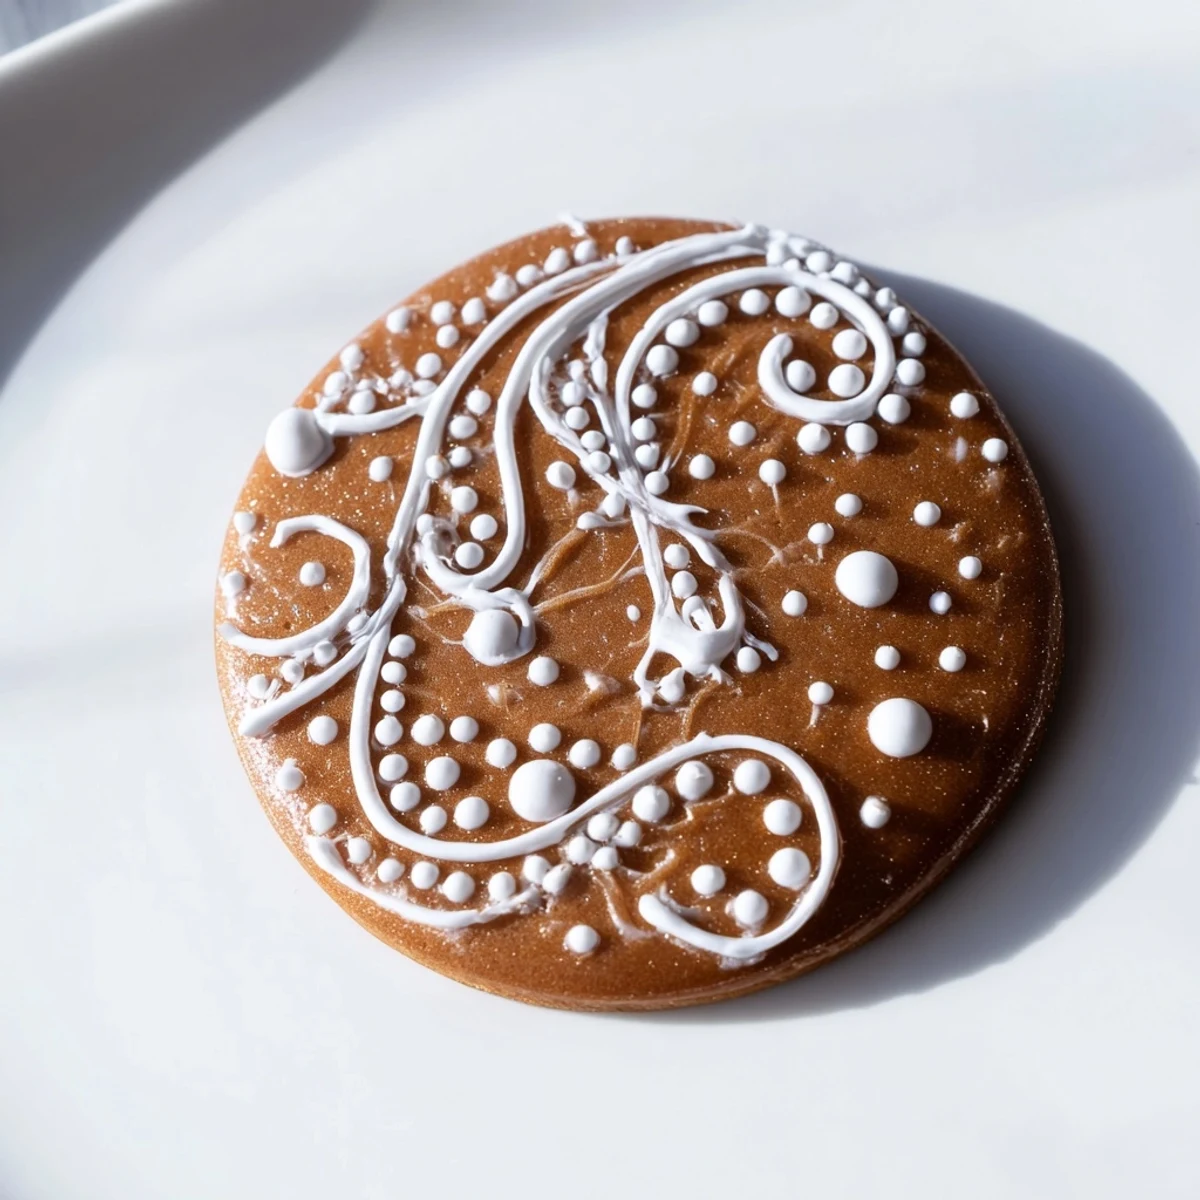
 This smooth and glossy icing is perfect for adding detailed designs to gingerbread, offering a vibrant finish and easy piping consistency. Made from powdered sugar, milk or water, and corn syrup, it can be adjusted to your preferred thickness. A firmer variation uses egg white or meringue powder, ideal for stable decorations. Color with gel food coloring and create festive flair. Let the icing dry completely before handling the decorated treats.
I'll never forget the first time I made gingerbread cookies with my grandmother—I was maybe seven, flour dusting my nose, watching her pipe the most intricate little snowflakes and holly leaves onto each golden cookie. Years later, when I finally asked her for the secret to that gorgeous, glossy icing that made the designs look professional yet deeply personal, she smiled and handed me a handwritten card with just a few simple ingredients. That's when I realized the magic wasn't in complexity—it was in understanding how powdered sugar, a touch of corn syrup, and patience could transform plain cookies into edible art. This icing has become my own tradition now, and I'm excited to share it with you.
I remember Christmas two years ago when my daughter insisted on decorating every single cookie herself, and instead of stress, I felt pure joy watching her carefully pipe tiny dots and lines with this icing. The fact that it held her vision without seizing up or running made her feel like a true decorator, and that moment—her concentrated little face, the pride when she held up her creation—is exactly why this recipe matters to me.
Ingredients
- Powdered sugar (2 cups, sifted): Sifting is non-negotiable here—it removes lumps that will clog your piping tip and creates that silky base. I learned the hard way to measure generously and sift it fresh; pre-sifted sugar sometimes settles.
- Milk or water (2 tablespoons): This is your consistency starter. I prefer milk for a slightly richer taste, but water gives you more control and keeps the icing pure white if that's your goal.
- Light corn syrup or glucose syrup (1 tablespoon): This is the secret weapon—it gives the icing that prized glossy finish and prevents it from drying chalky. It's worth seeking out; it makes all the difference.
- Pure vanilla extract (1/2 teaspoon, optional): A whisper of vanilla adds warmth without overpowering. I always include it because it feels like a little gift to the person eating the cookie.
- Egg white or meringue powder (for royal icing version): If you want firmer decorations that stack beautifully, this upgrade is essential. Meringue powder is the safer choice if you're nervous about raw eggs.
Instructions
- Gather and prepare your ingredients:
- Sift your powdered sugar directly into a medium bowl—don't skip this step. It only takes a minute and transforms the entire texture. Have your milk, corn syrup, and vanilla nearby so you can work smoothly.
- Whisk until glossy:
- Add the milk, corn syrup, and vanilla to your sugar and whisk steadily. You'll feel the mixture come together; keep going until it's completely smooth and has that coveted shine. This should take about two minutes of focused whisking.
- Find your perfect consistency:
- This is where intuition comes in. Dip a spoon in and let it drip—it should flow like honey, not water. If it's too thick, add milk a half teaspoon at a time, whisking between additions. If it's too thin, that's okay, just set it aside and use it for flooding instead.
- Add stability if you choose:
- For royal icing that firms up beautifully, add your egg white or meringue powder mixed with water. Beat this with an electric mixer until stiff peaks form—you'll see the volume increase and the texture become creamy and pale. This version is worth the extra step if you're stacking cookies.
- Color your canvas:
- Divide your icing into small bowls—one for each color you want to use. Use gel food coloring because it won't thin your icing the way liquid colors do. Start with just a tiny bit on a toothpick and stir it in; you can always add more, but you can't take it out.
- Fill your piping bags with intention:
- Fit your bags with fine tips—these are the key to crisp, detailed lines. Spoon the icing in carefully to avoid air bubbles, then gather the top and squeeze gently to test the flow. You're not far from decorating now.
- Decorate with patience:
- Work on cooled cookies only—warm cookies will smudge the icing and make you sad. Pipe slowly and deliberately. If you make a mistake, a tiny damp brush can usually help you fix it.
- Let time do its magic:
- Allow the icing to dry completely, about one to two hours, before stacking or wrapping. This patience now prevents heartbreak later when beautifully decorated cookies stick together.
 Save to Pinterest
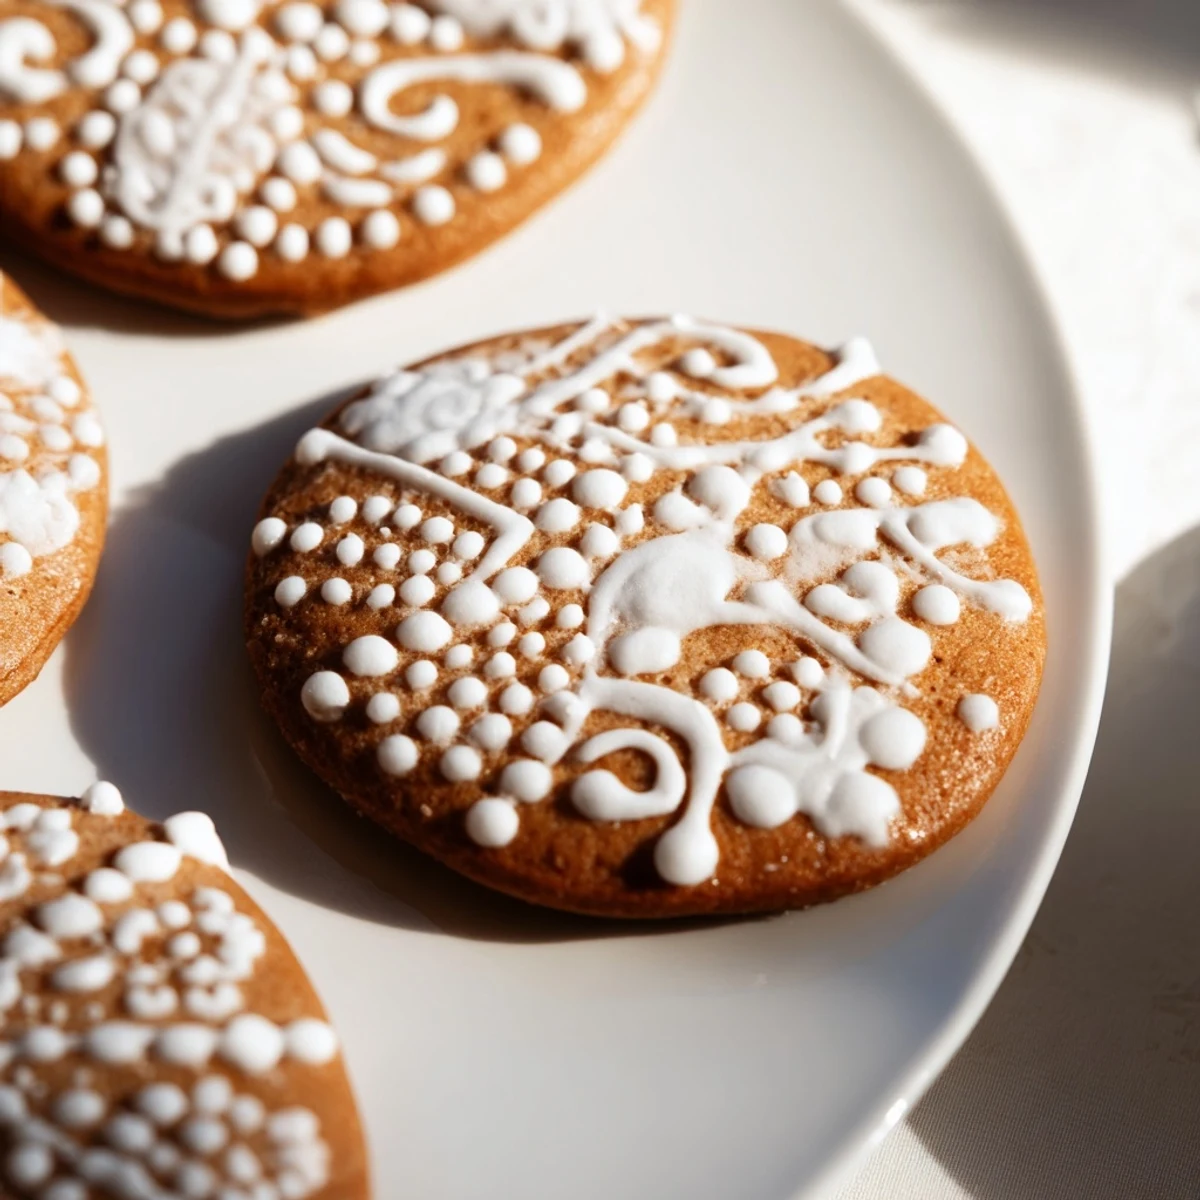
 There's something almost meditative about piping icing onto cookies, watching your hands move with intention to create something beautiful. I've learned that this icing is really about presence—it rewards patience and care with results that make people feel loved. Every detail you pipe is a small promise that someone took time to think about their joy.
The Royal Icing Upgrade
If you're ready to level up, the royal icing version is worth every extra step. The egg white or meringue powder transforms the icing from soft-set to genuinely sturdy, which means you can stack your cookies without worrying, pipe details that stand up three-dimensional, and even let kids decorate without everything sliding around. I use this version whenever I'm creating a display that needs to last a few days or when I'm making cookies as gifts that will travel. The texture becomes almost like edible cement—smooth, professional, and forgiving in its own way.
Customizing Your Colors
One of the joys of this icing is how it becomes a blank canvas for your creativity. Beyond the obvious reds and greens, I've discovered that dusty rose, sage green, and creamy ivory create a surprisingly sophisticated palette that photographs beautifully. Start with less coloring than you think you need—gel colors are potent, and you can always deepen the shade. I keep a tiny notebook where I jot down successful color combinations for future years because I never remember exactly what mix created that perfect forest green.
Decorating Techniques and Timing
Once you master the basic piping, the real artistry begins. Thin lines come from light pressure and a fine tip; thicker lines from more pressure or a wider tip. You can layer colors by piping one shade, letting it set for thirty minutes, then piping over it in a contrasting color. I've learned that the most impressive-looking cookies often come from simple, repeated patterns rather than overly complex designs. Snowflakes, dots, holly leaves, and striped lines create impact with fewer mistakes. One final thought before you begin: take a breath, go slowly, and remember that imperfections give your cookies soul and character.
- Let each layer set slightly before adding details on top to prevent colors from muddying together
- Keep a damp cloth nearby to wipe your tips between colors so you don't muddy your palette
- Practice your design on parchment paper first if you're nervous—icing is forgiving when you learn its quirks
 Save to Pinterest
 This simple icing is a gift you give to yourself and the people you love—five minutes of mixing creates hours of joy and edible beauty. May your gingerbread cookies be adorned with care and proudly displayed, because they deserve to be.
Recipe Questions & Answers
- → What gives the icing its smooth texture?
-
The powdered sugar combined with milk or water and corn syrup creates a glossy, smooth consistency that's easy to pipe and decorate with.
- → How can I make the icing firmer for detailed decorations?
-
Adding egg white or meringue powder while whisking helps the icing hold stiff peaks for more stable and intricate designs.
- → Can I use this icing with gel food coloring?
-
Yes, gel food coloring works best as it adds vibrant colors without thinning out the icing.
- → How long does the icing take to dry completely?
-
The icing should dry fully within 1 to 2 hours before stacking or packaging the gingerbread decorations.
- → Is there a vegan alternative for this icing?
-
For a vegan version, use water or plant-based milk and omit the egg white or meringue powder to maintain a smooth texture.
- → How should leftover icing be stored?
-
Store unused icing in an airtight container in the refrigerator for up to 3 days and re-whisk before use to restore consistency.
