 Save to Pinterest
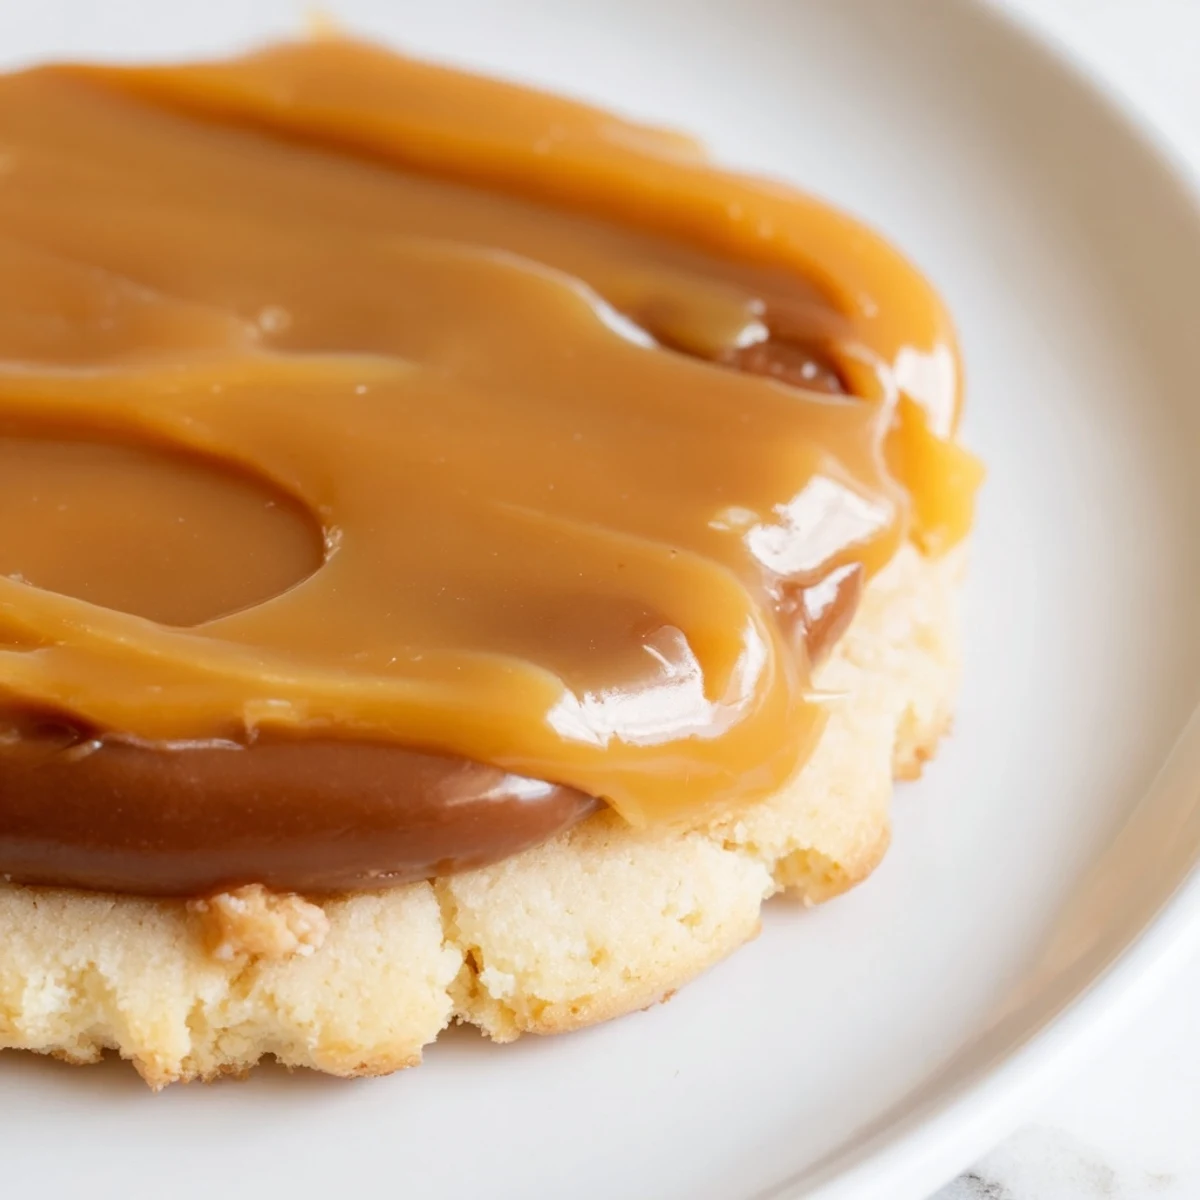
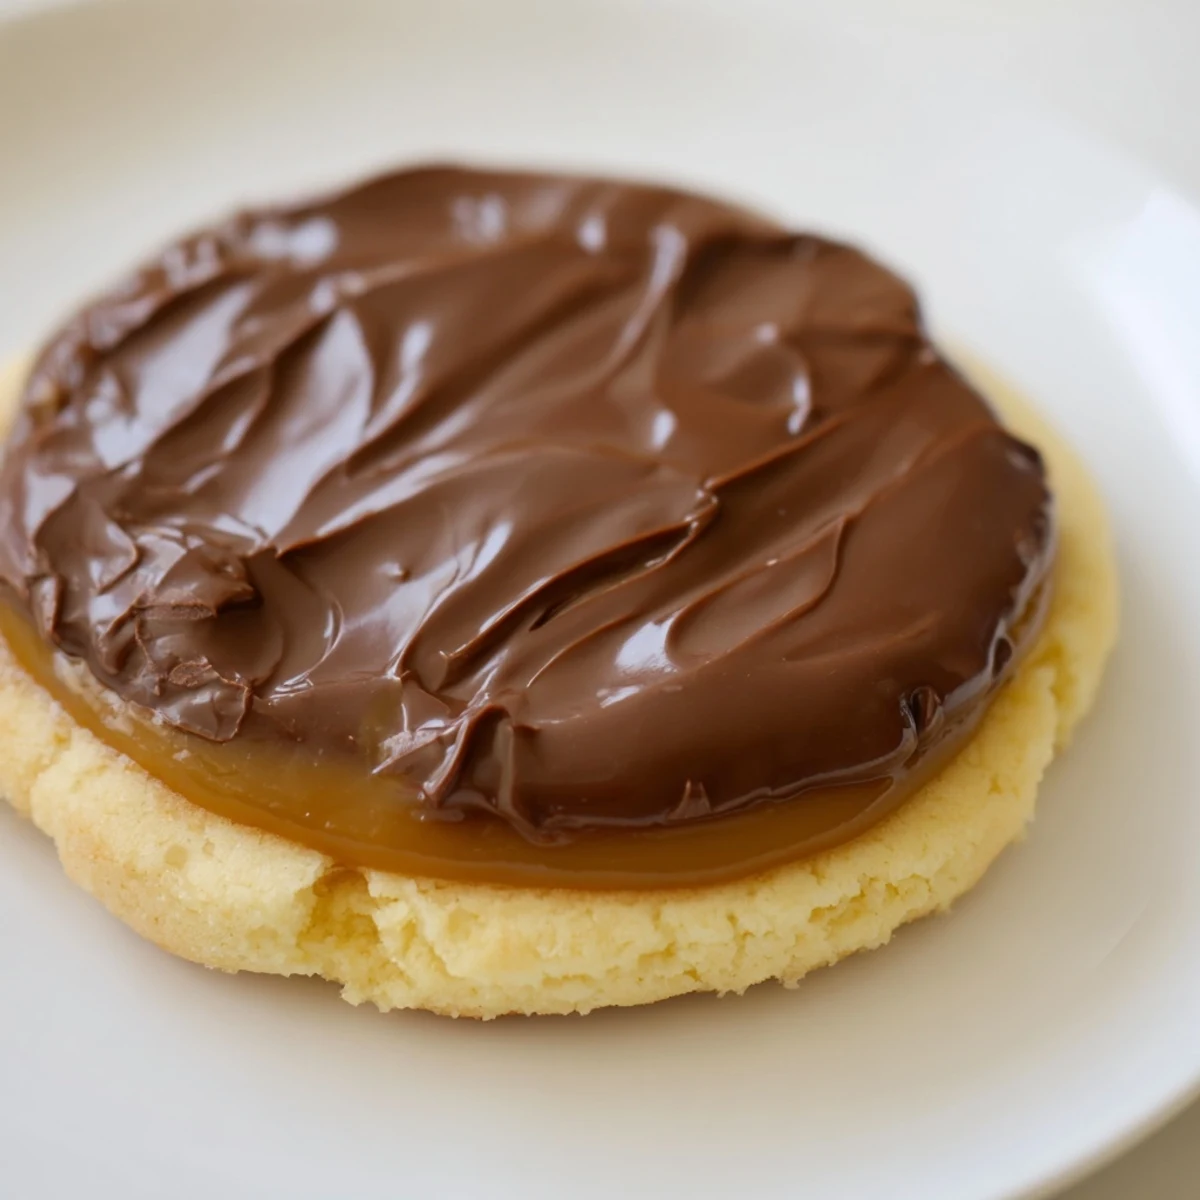
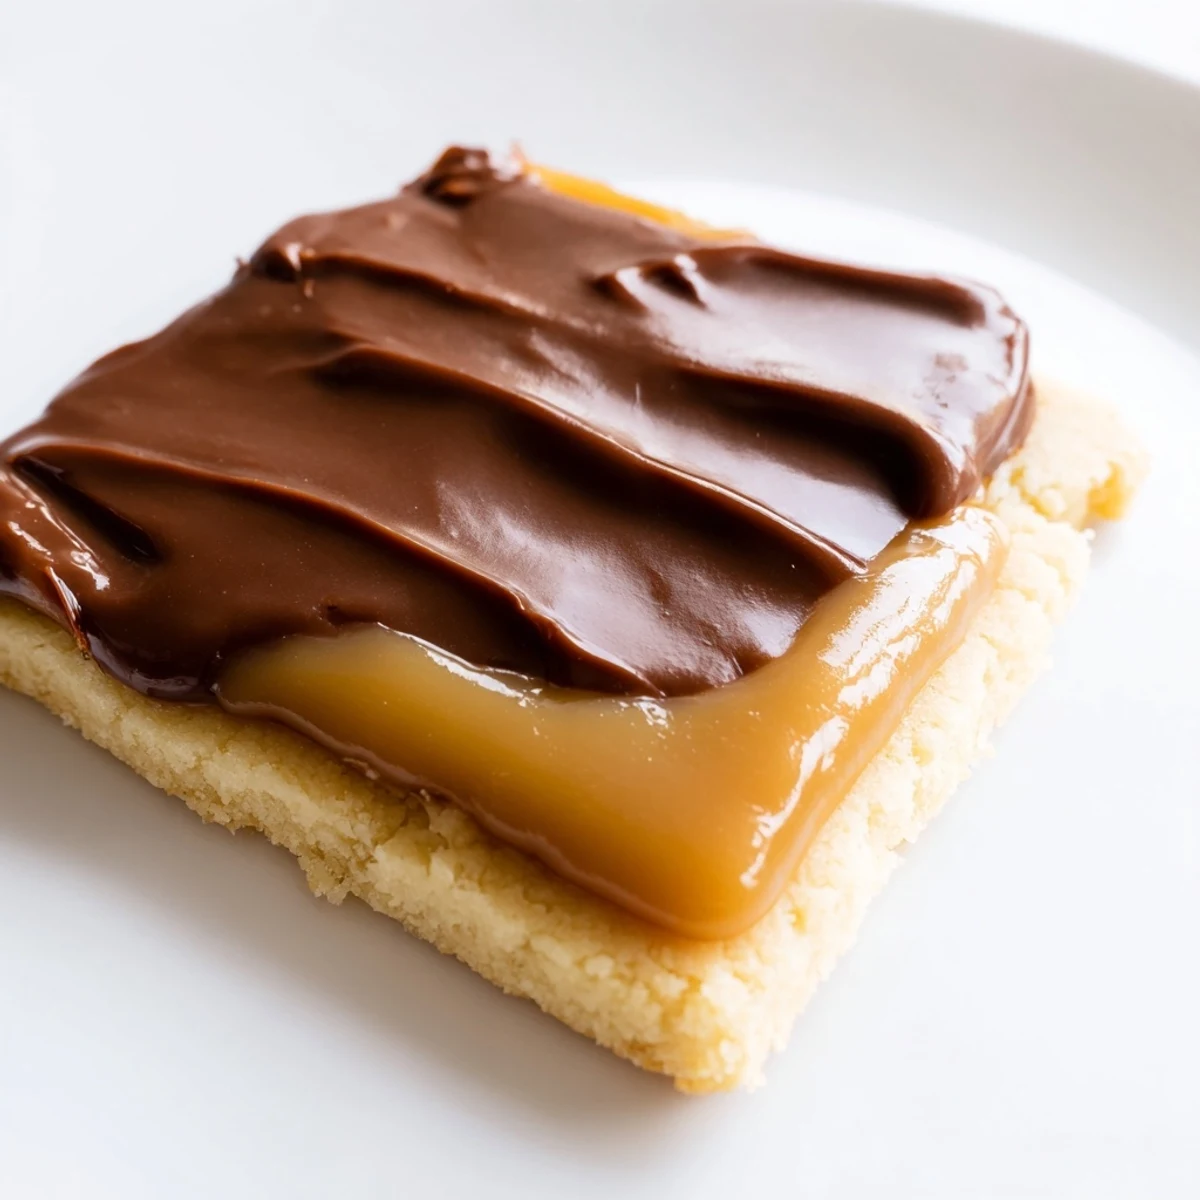
 This delightful treat combines a rich, buttery shortbread base with a smooth layer of creamy caramel. The cookies are finished with a glossy milk chocolate topping, creating a perfect balance of textures and flavors. The dough is chilled before baking to maintain its shape and tenderness. After baking, the caramel layer is spread on top and chilled to set before adding melted chocolate. These bars offer a satisfying crunch followed by creamy sweetness, ideal for sharing at celebrations or indulging anytime.
The smell of butter browning in the oven always pulls me back to my grandmother's kitchen, where she'd press thumbprints into shortbread dough and fill them with whatever jam she had on hand. These Twix cookies started as an attempt to recreate that buttery comfort, but somewhere along the way I got carried away adding caramel and chocolate until they morphed into something entirely different and infinitely more dangerous.
Last Christmas, my sister took one bite and immediately declared these the enemy of her jeans but the love of her life. We ended up wrapping them in little parchment bundles and sneaking them to neighbors like contraband, mostly so we wouldn't eat the entire batch ourselves while watching holiday movies.
Ingredients
- Unsalted butter (225 g): Softened to room temperature, this forms the foundation of that melt in your mouth shortbread texture. I've learned the hard way that cold butter creates tough cookies.
- Granulated sugar (100 g): Just enough sweetness to let the butter shine without making the shortbread cloying.
- All-purpose flour (250 g): Provides structure while keeping the cookie tender. Don't be tempted to add more flour or you'll lose that delicate crumb.
- Salt (1/4 tsp): A tiny pinch that elevates the butter flavor and prevents the cookies from tasting flat.
- Vanilla extract (1 tsp): Use pure vanilla extract here. The difference in flavor depth is worth the extra expense.
- Thick caramel sauce (320 g): Store-bought dulce de leche works beautifully, but homemade caramel sauce with sea salt is absolutely worth the effort if you have time.
- Milk chocolate (200 g): Chopped into small pieces for even melting. The classic Twix flavor comes through best with milk chocolate, though I've made a dark chocolate version for serious chocolate lovers.
- Unsalted butter (1 tbsp): Added to the chocolate creates a glossy finish and helps it set properly without becoming too hard.
Instructions
- Prepare your baking space:
- Preheat your oven to 350°F (175°C) and line two baking sheets with parchment paper. This prep step matters because the caramel and chocolate layers need to set quickly later.
- Cream the butter and sugar:
- Beat the softened butter and granulated sugar together until the mixture looks pale and fluffy, about 2-3 minutes. The air you incorporate here makes the shortbread lighter.
- Bring the dough together:
- Mix in the vanilla extract, then gradually add the flour and salt until the mixture forms a soft dough that holds together when pinched.
- Shape the cookies:
- Roll the dough into 1-inch balls and place them on the prepared sheets, leaving about 2 inches between each. Flatten gently with your palm or the bottom of a glass to about 1/2 inch thickness.
- Bake until golden:
- Bake for 12-15 minutes, watching for the edges to turn just barely golden. They'll still look pale in the center, but that's exactly how they should look.
- Let them cool completely:
- Cool the cookies on wire racks until they reach room temperature. Warm cookies will melt your caramel right off, so patience here saves you from a sticky mess later.
- Add the caramel layer:
- Spread 1-2 teaspoons of caramel onto each cooled cookie, then chill the entire tray for 30 minutes. This step firms the caramel enough to handle the warm chocolate topping.
- Melt the chocolate:
- Combine the chopped milk chocolate and tablespoon of butter in a heatproof bowl over simmering water, stirring until completely smooth and glossy.
- Finish with chocolate:
- Spoon or spread the melted chocolate over the caramel layer on each cookie, then return them to the refrigerator for 15 minutes until the chocolate sets completely.
 Save to Pinterest
 These became my go-to contribution to bake sales after someone slipped an extra twenty into the donation jar and whispered that she'd pay double if I made them again. Sometimes food becomes its own kind of currency.
Getting the Layers Right
The key to these cookies is patience between layers. I once tried to rush the process and ended up with caramel sliding off the sides and chocolate that never quite set. Now I treat each layer as its own mini project, letting the shortbread cool completely and the caramel firm up before moving on. The extra time feels luxurious, like you're building something special instead of just throwing ingredients together.
Making Them Your Own
Last summer I made a version with dark chocolate and added a pinch of flaky sea salt on top, which my friend Sarah still talks about like it changed her life. The classic milk chocolate version is nostalgic and perfect, but don't be afraid to experiment with different chocolates or add nuts to the caramel. Just keep the shortbread base the same and let your creativity take over with the toppings.
Storage and Serving
These cookies actually improve after a day, as the flavors meld together and the textures soften slightly. Store them in an airtight container at cool room temperature, away from direct sunlight or heat sources. The chocolate can bloom if they get too warm, so in summer I keep them in the fridge and bring them out about 20 minutes before serving.
- Layer the cookies between parchment paper to prevent sticking
- They freeze beautifully for up to three months if you need to get ahead
- Serve with coffee or milk to cut through the richness
 Save to Pinterest
 Every time I make these, I'm reminded that the best recipes often come from playing around in the kitchen without a plan. Sometimes the happiest accidents are the ones worth repeating.
Recipe Questions & Answers
- → How do I achieve a tender shortbread base?
-
Use softened unsalted butter and avoid overmixing the dough. Chilling helps maintain texture by preventing spreading during baking.
- → Can I use homemade caramel for the topping?
-
Yes, homemade caramel or dulce de leche works well. Ensure it’s thick enough to spread without running.
- → What type of chocolate is best for topping?
-
Milk chocolate provides a smooth finish, but dark or semi-sweet varieties can enhance richness if preferred.
- → Why chill the cookies after adding caramel and chocolate layers?
-
Chilling allows both layers to set firmly, preventing melting or slipping and ensuring clean slices.
- → How should these treats be stored?
-
Keep in an airtight container at room temperature for up to five days to preserve freshness and texture.
